If you’ve ever held a piece of heavy machinery, a train component, or even a mining tool and wondered “How was this made?” — chances are, it began as molten steel poured into a precisely designed mold. Steel casting may sound complex and highly technical, but once you break it down, the process follows a clear and logical sequence.
For engineers, buyers, project managers, and anyone new to the field, understanding the steel casting process is not just helpful — it’s essential. The casting method you choose and how each step is controlled can significantly affect the final product’s strength, durability, cost, and performance.
In this beginner-friendly guide, we will walk through the steel casting process step-by-step, explaining each stage in simple terms, with practical insights that will help you make informed decisions — whether you are sourcing steel cast parts, designing new components, or simply learning how the industry works.
The casting of steel castings is a complex system engineering project, which mainly includes the following key steps. The entire process can be summarized as: from part drawing to qualified casting, it requires a series of processes such as mold design, molding, melting, pouring, cleaning, and post-processing.
Phase One: Preparation Stage
1. Process Design and Mold Making
This is the "blueprint" stage of casting, and it is crucial.
-
Drawing Review and Process Design: Analyze the part drawing based on its structure, technical requirements, and batch size to determine:
- Parting Line: The surface that divides the mold into two or more parts to facilitate the removal of the pattern.
- Gating System: The channel through which molten metal flows into the mold cavity, including the pouring cup, sprue, runners, and gates.
- Risers and Chills: Risers are used to feed the shrinkage of the casting during solidification, preventing shrinkage cavities and porosity; chills are used to accelerate local cooling and control the solidification sequence.
- Machining Allowance: The dimensions reserved for subsequent machining.
-
Mold Making: Based on the process design, create the mold that forms the external shape of the casting. Depending on the production method and material, the mold can be:
- Wooden Pattern / Metal Pattern: Used for sand casting, the shape of the pattern itself is the final shape of the casting.
- Permanent Mold (Die): Used for permanent mold casting, the mold itself is a heat-resistant metal cavity.
- Investmental Pattern: Used for investment casting, typically a pattern made of wax.
Phase Two: Molding and Coremaking
The goal of this stage is to create the mold that forms the external contour of the casting and the cores that form the internal cavities of the casting.
2. Molding
Fill the molding material around the pattern to form the cavity for the external shape of the casting. Common methods include:
-
Sand Casting: This is the most commonly used method.
- Molding Materials: Typically composed of base sand (e.g., silica sand), binders (e.g., clay, resin), and additives.
- Molding Methods: Include manual molding and machine molding (jolt-squeeze, shoot-squeeze, high-pressure squeeze, etc.). Machine molding is efficient and produces molds with good strength and quality.
- Other Molding Methods: Also include permanent mold casting, investment casting, lost foam casting, etc., each with different molding methods.
3. Coremaking
Making the cores that form the internal cavities and holes of the casting. Cores are usually made of core sand (e.g., pre-coated sand, resin sand) in a core box, requiring higher strength and refractoriness than molding sand. After making, they may need baking to increase strength.
4. Mold Closing (Closing the Flask)
Assemble all the prepared parts, such as the drag (bottom mold), cope (top mold), and cores, to form a complete mold ready for pouring. This step must ensure the accurate positioning of the cavity and cores, and clamp the cope and drag together to prevent "run-out" (leakage of molten metal) during pouring.
Phase Three: Melting and Pouring
5. Melting
Melt and refine raw materials such as scrap steel, pig iron, and alloying elements in melting furnaces (e.g., electric arc furnace, medium frequency induction furnace) according to the chemical composition requirements of the specific steel grade.
- Goal: To obtain pure molten steel with qualified chemical composition, low gas and inclusion content, and sufficiently high temperature.
- Process: Includes stages such as melting, oxidation, reduction, and alloying.
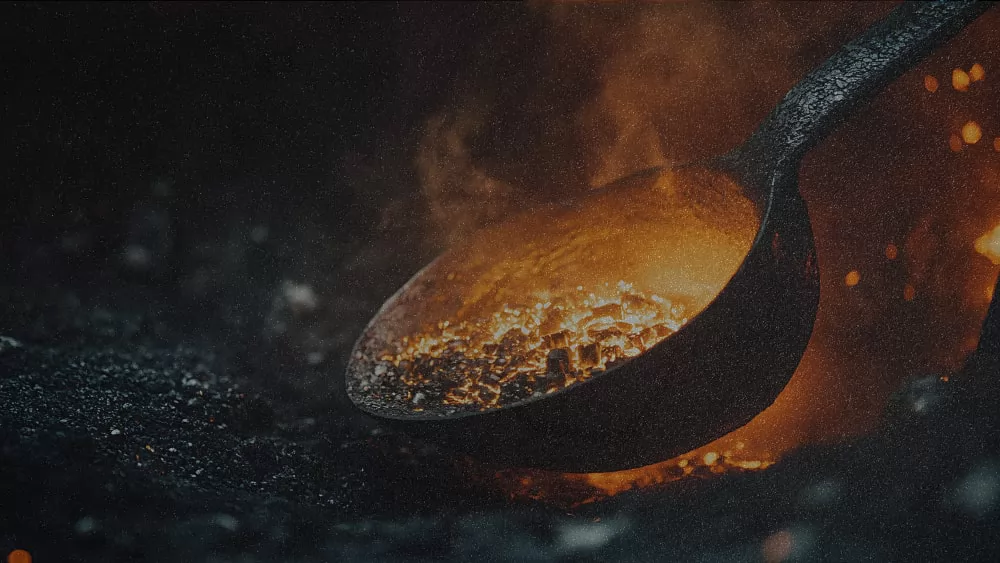
6. Pouring
Pour the molten steel from the ladle into the closed mold.
-
Key Control Points:
- Pouring Temperature: Too high a temperature can easily cause sand burning and coarse grains; too low a temperature results in poor fluidity, leading to defects like cold shuts and misruns.
- Pouring Speed: The speed should be steady, both to prevent splashing of molten steel and to ensure the mold cavity is filled smoothly.
Phase Four: Cooling and Shakeout/Cleaning
7. Cooling
After pouring, allow the mold to cool under natural or controlled conditions until the casting is completely solidified and cools to a certain temperature. Cooling time depends on the size and wall thickness of the casting.
8. Shakeout
After the casting has cooled, separate it from the sand mold by means of vibration, knocking, etc. The discarded sand is usually recycled and reused after treatment.
9. Cleaning (Fettling)
Remove sand particles adhering to the casting surface, and excess metal (such as the gating and riser system, flash, burrs, etc.).
- Methods: Knocking off gates and risers, grinding with abrasive wheels, shot blasting/shot peening, etc. Shot blasting not only cleans but also strengthens the casting surface.
Phase Five: Post-Processing and Inspection
10. Heat Treatment
The vast majority of steel castings must undergo heat treatment to eliminate casting stress, refine grains, homogenize chemical composition and structure, thereby obtaining the required mechanical properties.
- Common Processes: Annealing, normalizing, normalizing + tempering, quenching + tempering, etc.
11. Welding Repair and Rectification
For minor defects detected (such as pores, sand inclusions), if they fall within the range permitted by the technical standards, they can be repaired by welding.
12. Final Inspection
This is the final checkpoint before leaving the factory, ensuring the casting quality is qualified.
- Visual Inspection: Check for surface defects.
- Dimensional Inspection: Check key dimensions using calipers, gauges, coordinate measuring machines (CMM), etc.
- Non-Destructive Testing (NDT): Such as ultrasonic testing, radiographic testing, magnetic particle testing, etc., used to inspect internal and surface micro-defects.
- Mechanical Property Testing: Take samples from test coupons of the same heat/batch for tensile, impact, hardness, etc., tests.
- Chemical Composition Analysis: Ensure the material composition meets the standard.
13. Painting and Shipping
Qualified castings are packaged and shipped after anti-rust painting.
Looking for a truly reliable steel casting partner?
Whether you’re launching a new project or seeking a more stable, cost-effective supplier for existing parts, we’re ready to be your one-stop steel casting solution. With years of experience serving high-demand sectors— construction equipment, trucks & trailers, mining machinery, rail systems and heavy industrial equipment—we don’t just make parts, we understand how they must perform in real working conditions.
At Qianhao, we specialize in high-precision and heavy-duty steel castings and offer a full range of services tailored to demanding applications: precision heavy steel castings, investment (lost-wax) and sand casting, CNC machining and professional heat treatment, plus complete OEM part production from prototype to volume.
We know what matters to procurement teams and engineers: reliable lead times, strict adherence to drawings, consistent quality that won’t disrupt assembly or field performance, and fast, effective problem response. Those are the things we measure ourselves by.
Send us your drawings, technical requirements, or a sample and we’ll quickly evaluate manufacturability and provide a competitive, actionable quote. We’ll also offer a practical process recommendation to help you save time and cost while improving part reliability.
Ready to get started? Email your files or send your requirements now — we will reply within 12 hours. Let’s make your next project smoother, faster and more reliable.


